Note: The mass email function is only available after the company mailbox is assigned a dedicated sending IP and the mass email resource package is purchased.
I. Log in to the Email Console
Go to https://www.share-email.com/web#/login and sign in to your email console.
II. Access the Bulk Send Page
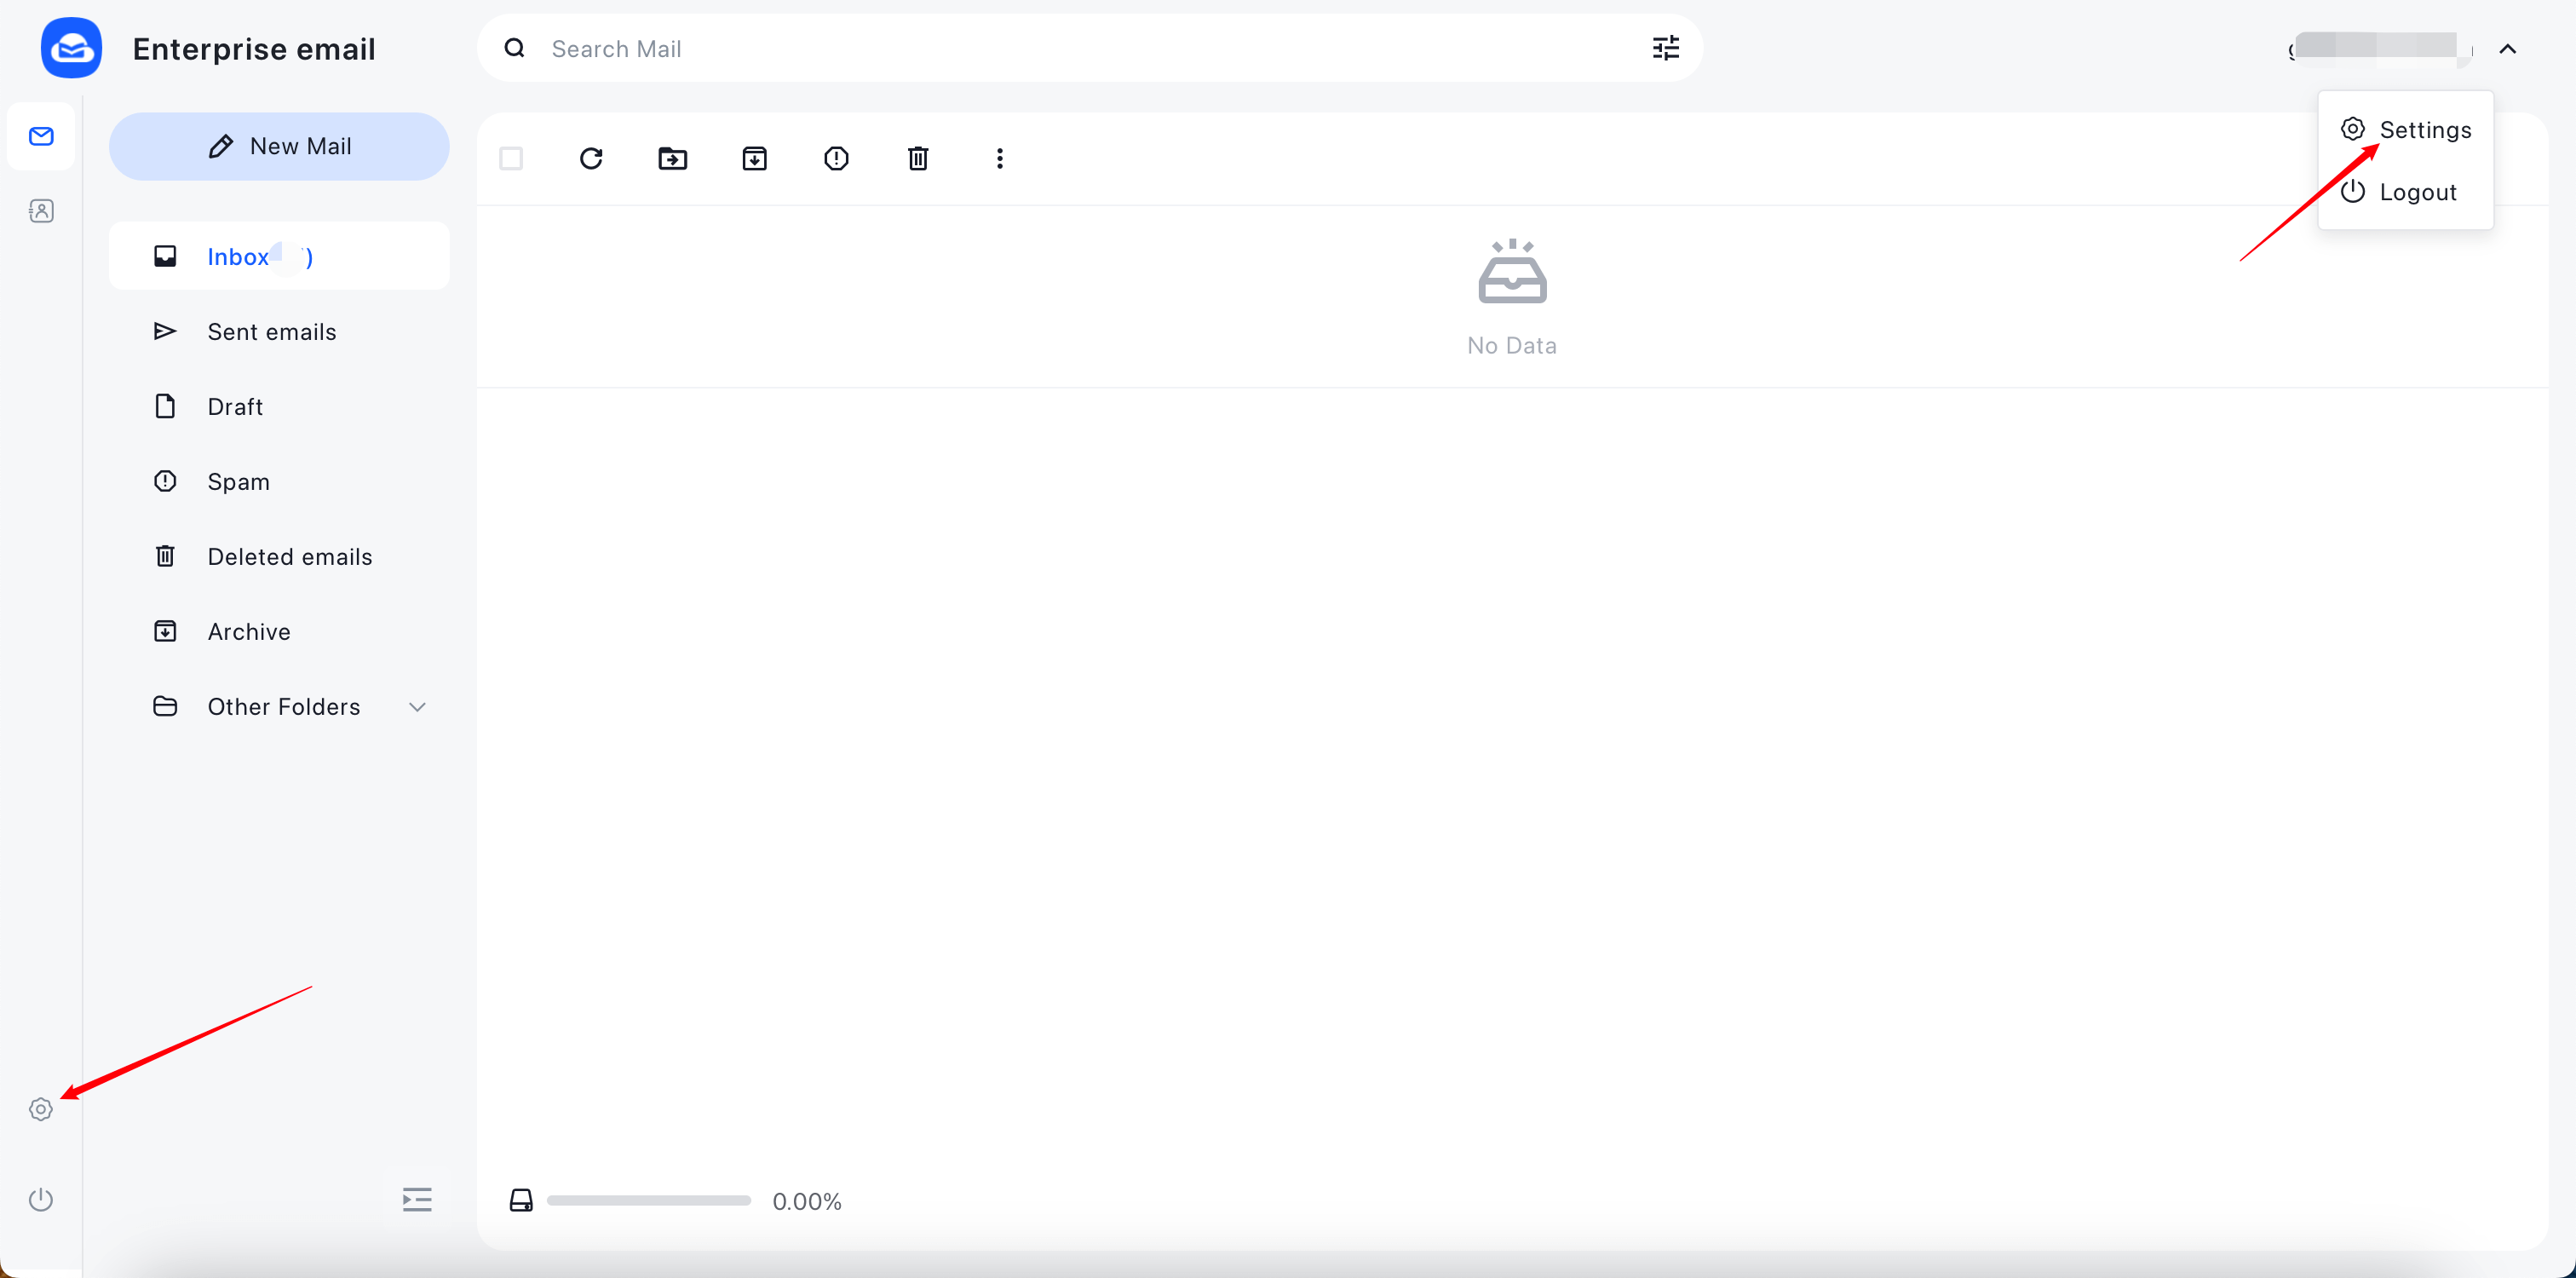
Once logged in, click the Settings option (or the Settings icon) in the top-right corner to enter the email settings page.
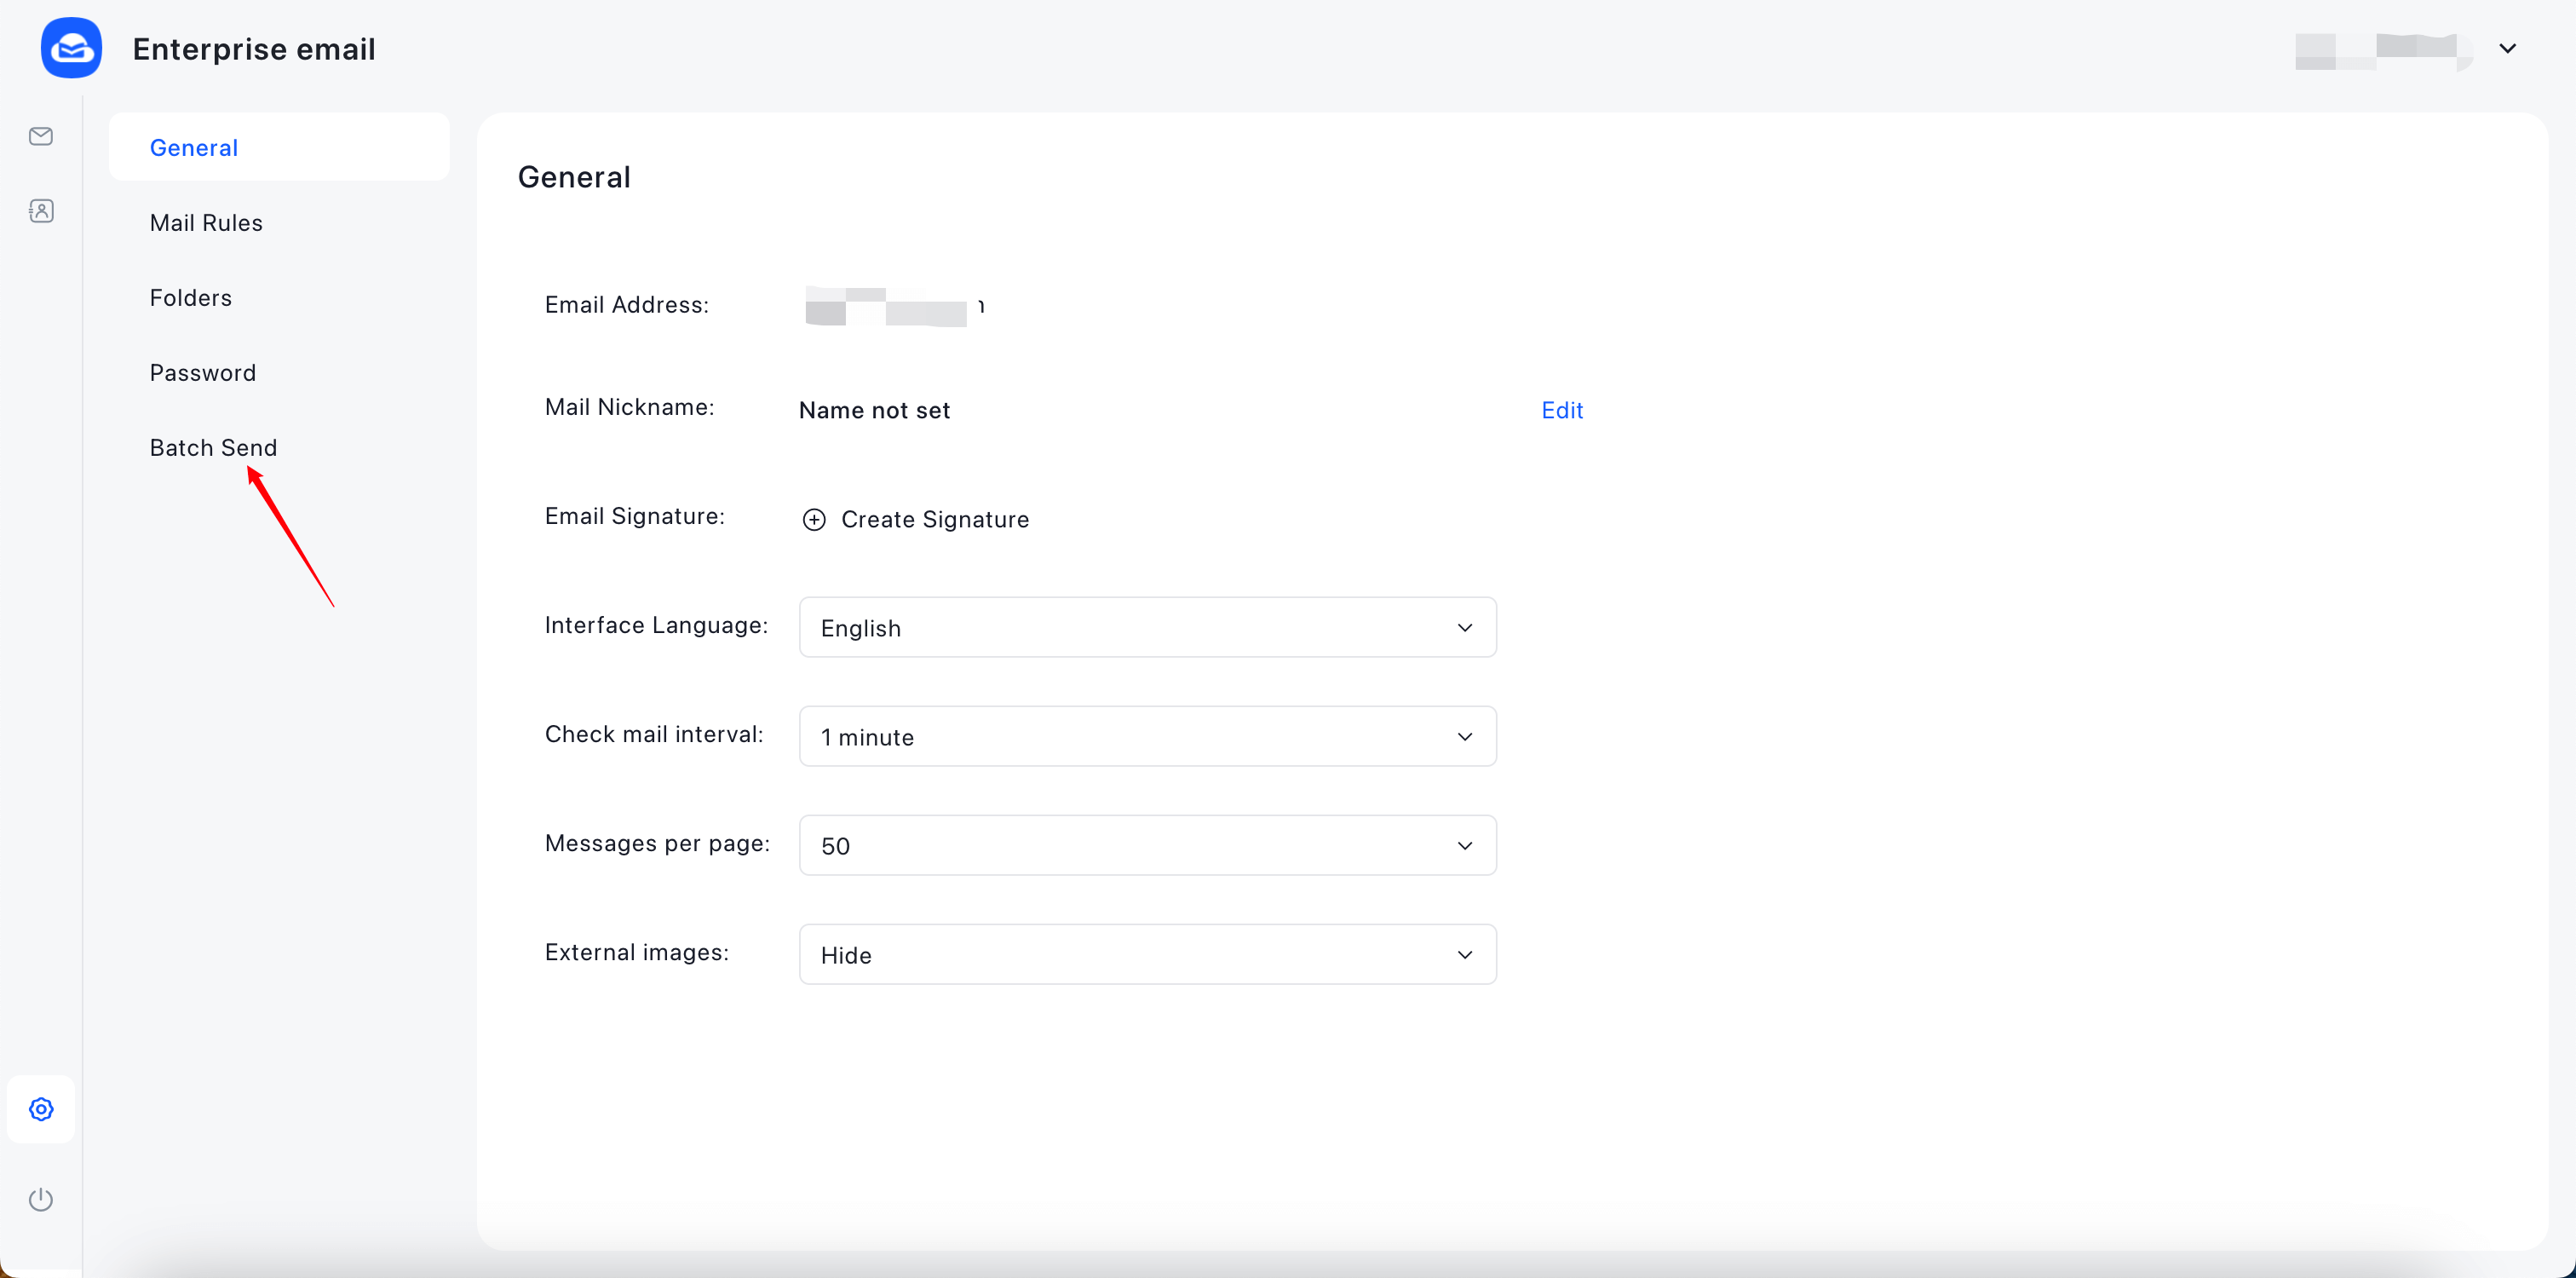
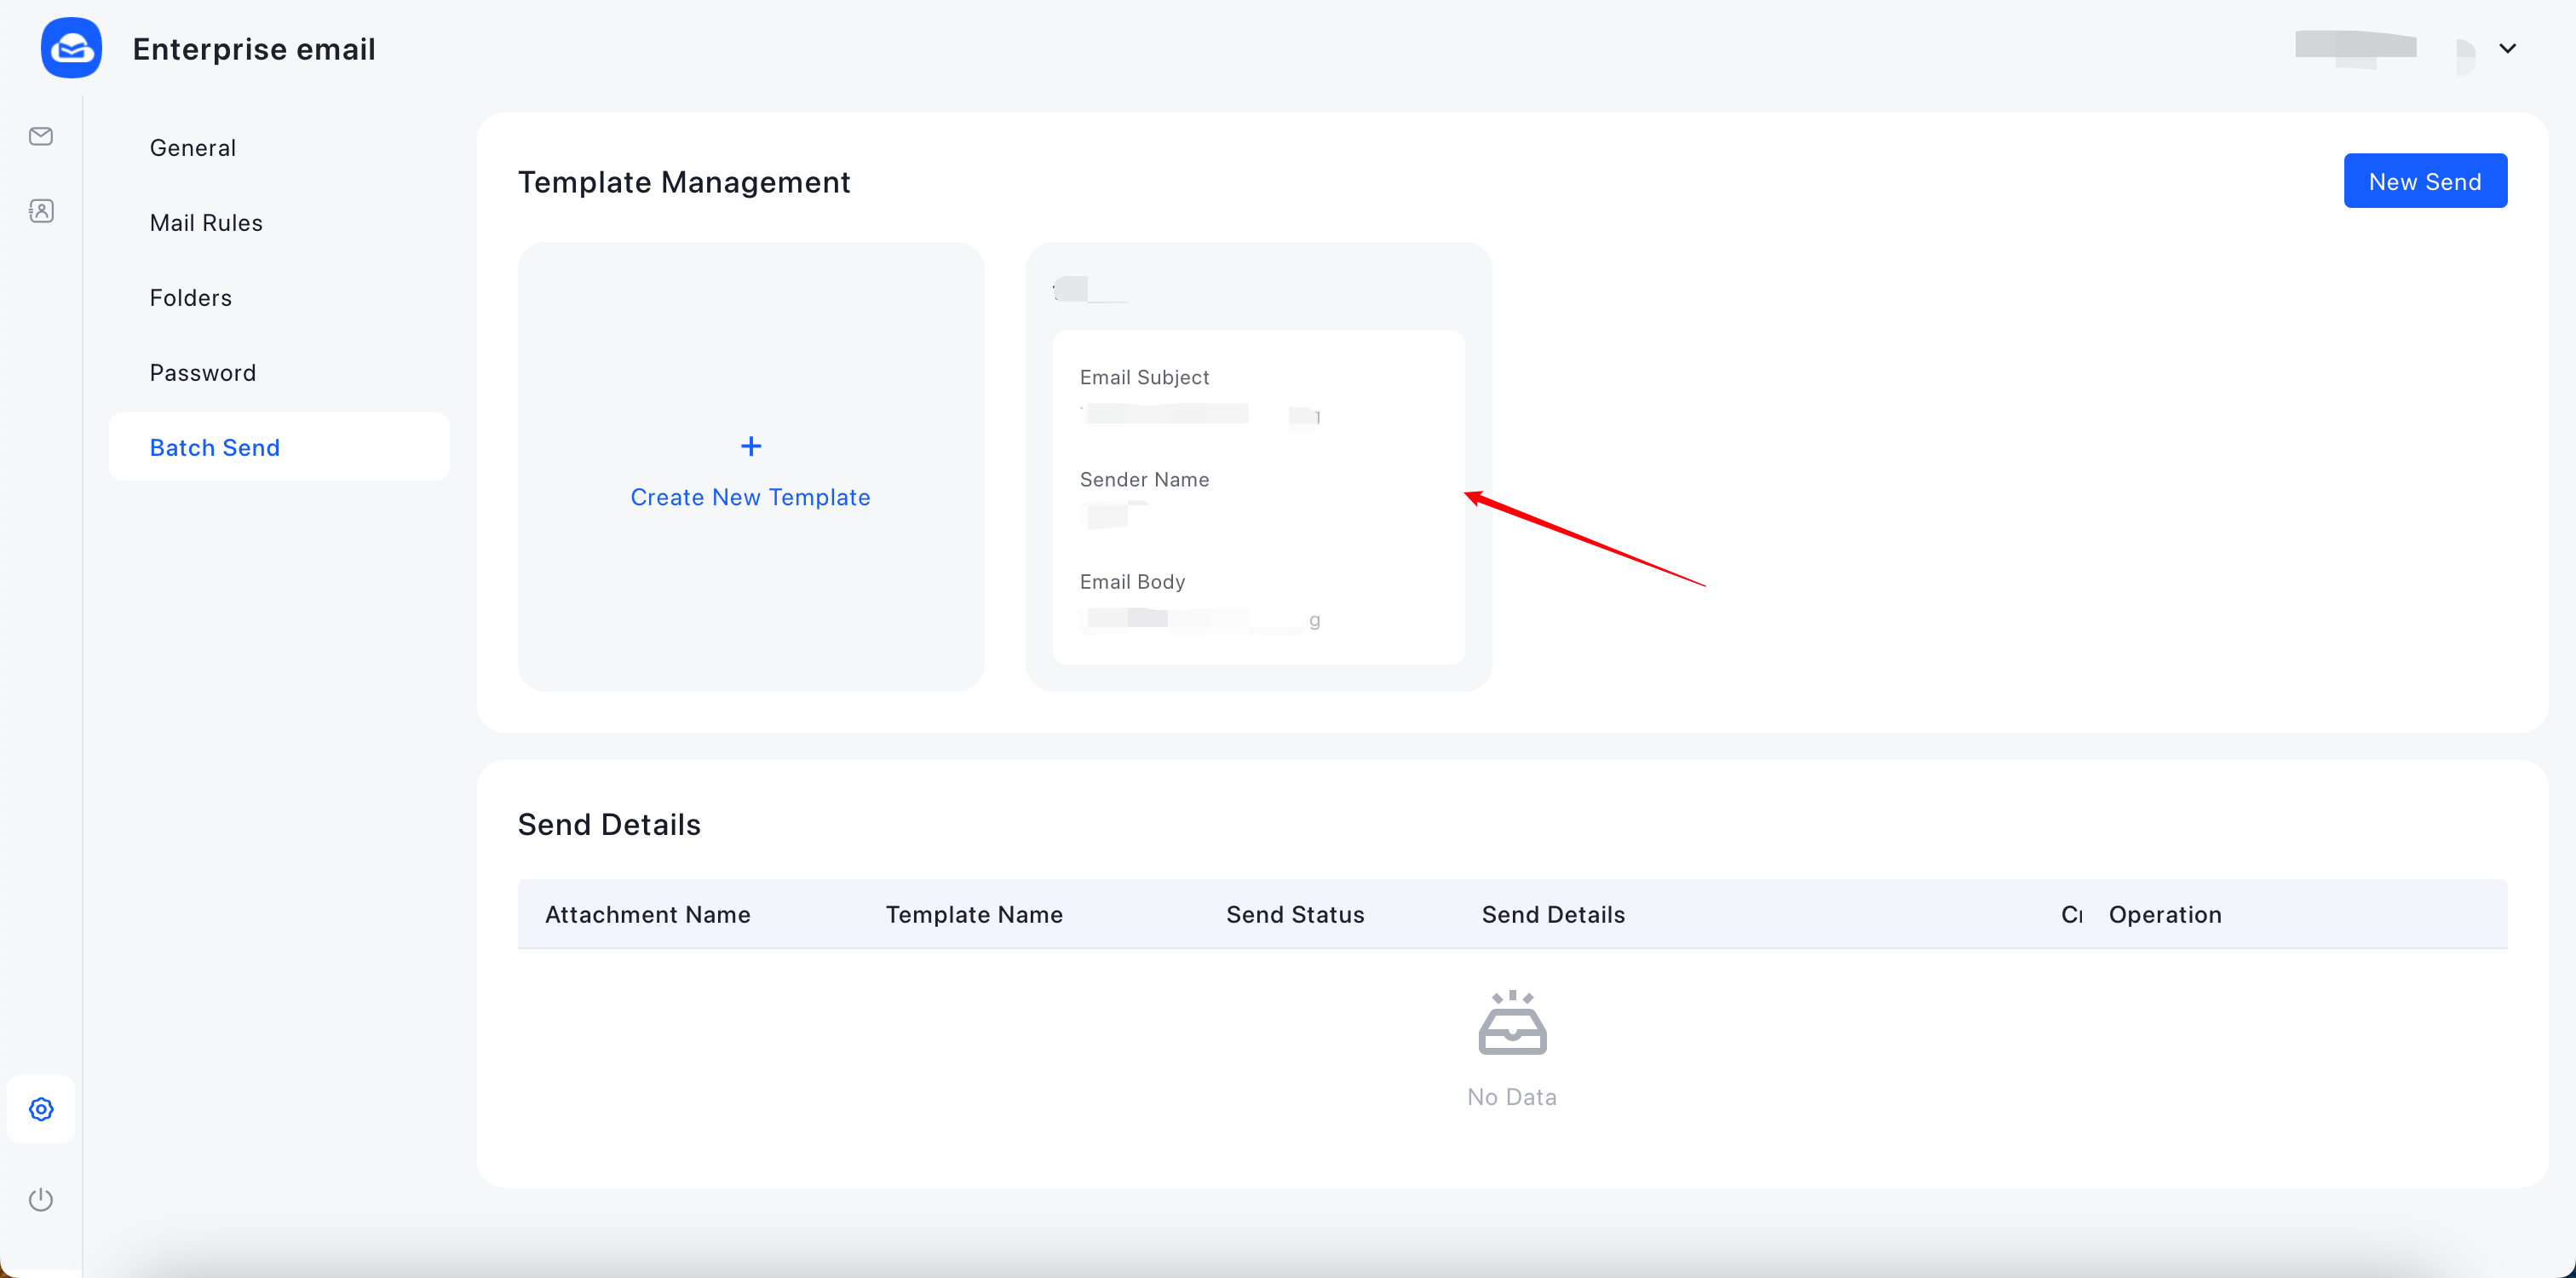
1. Click Bulk Send on the settings page to enter the bulk send management panel.
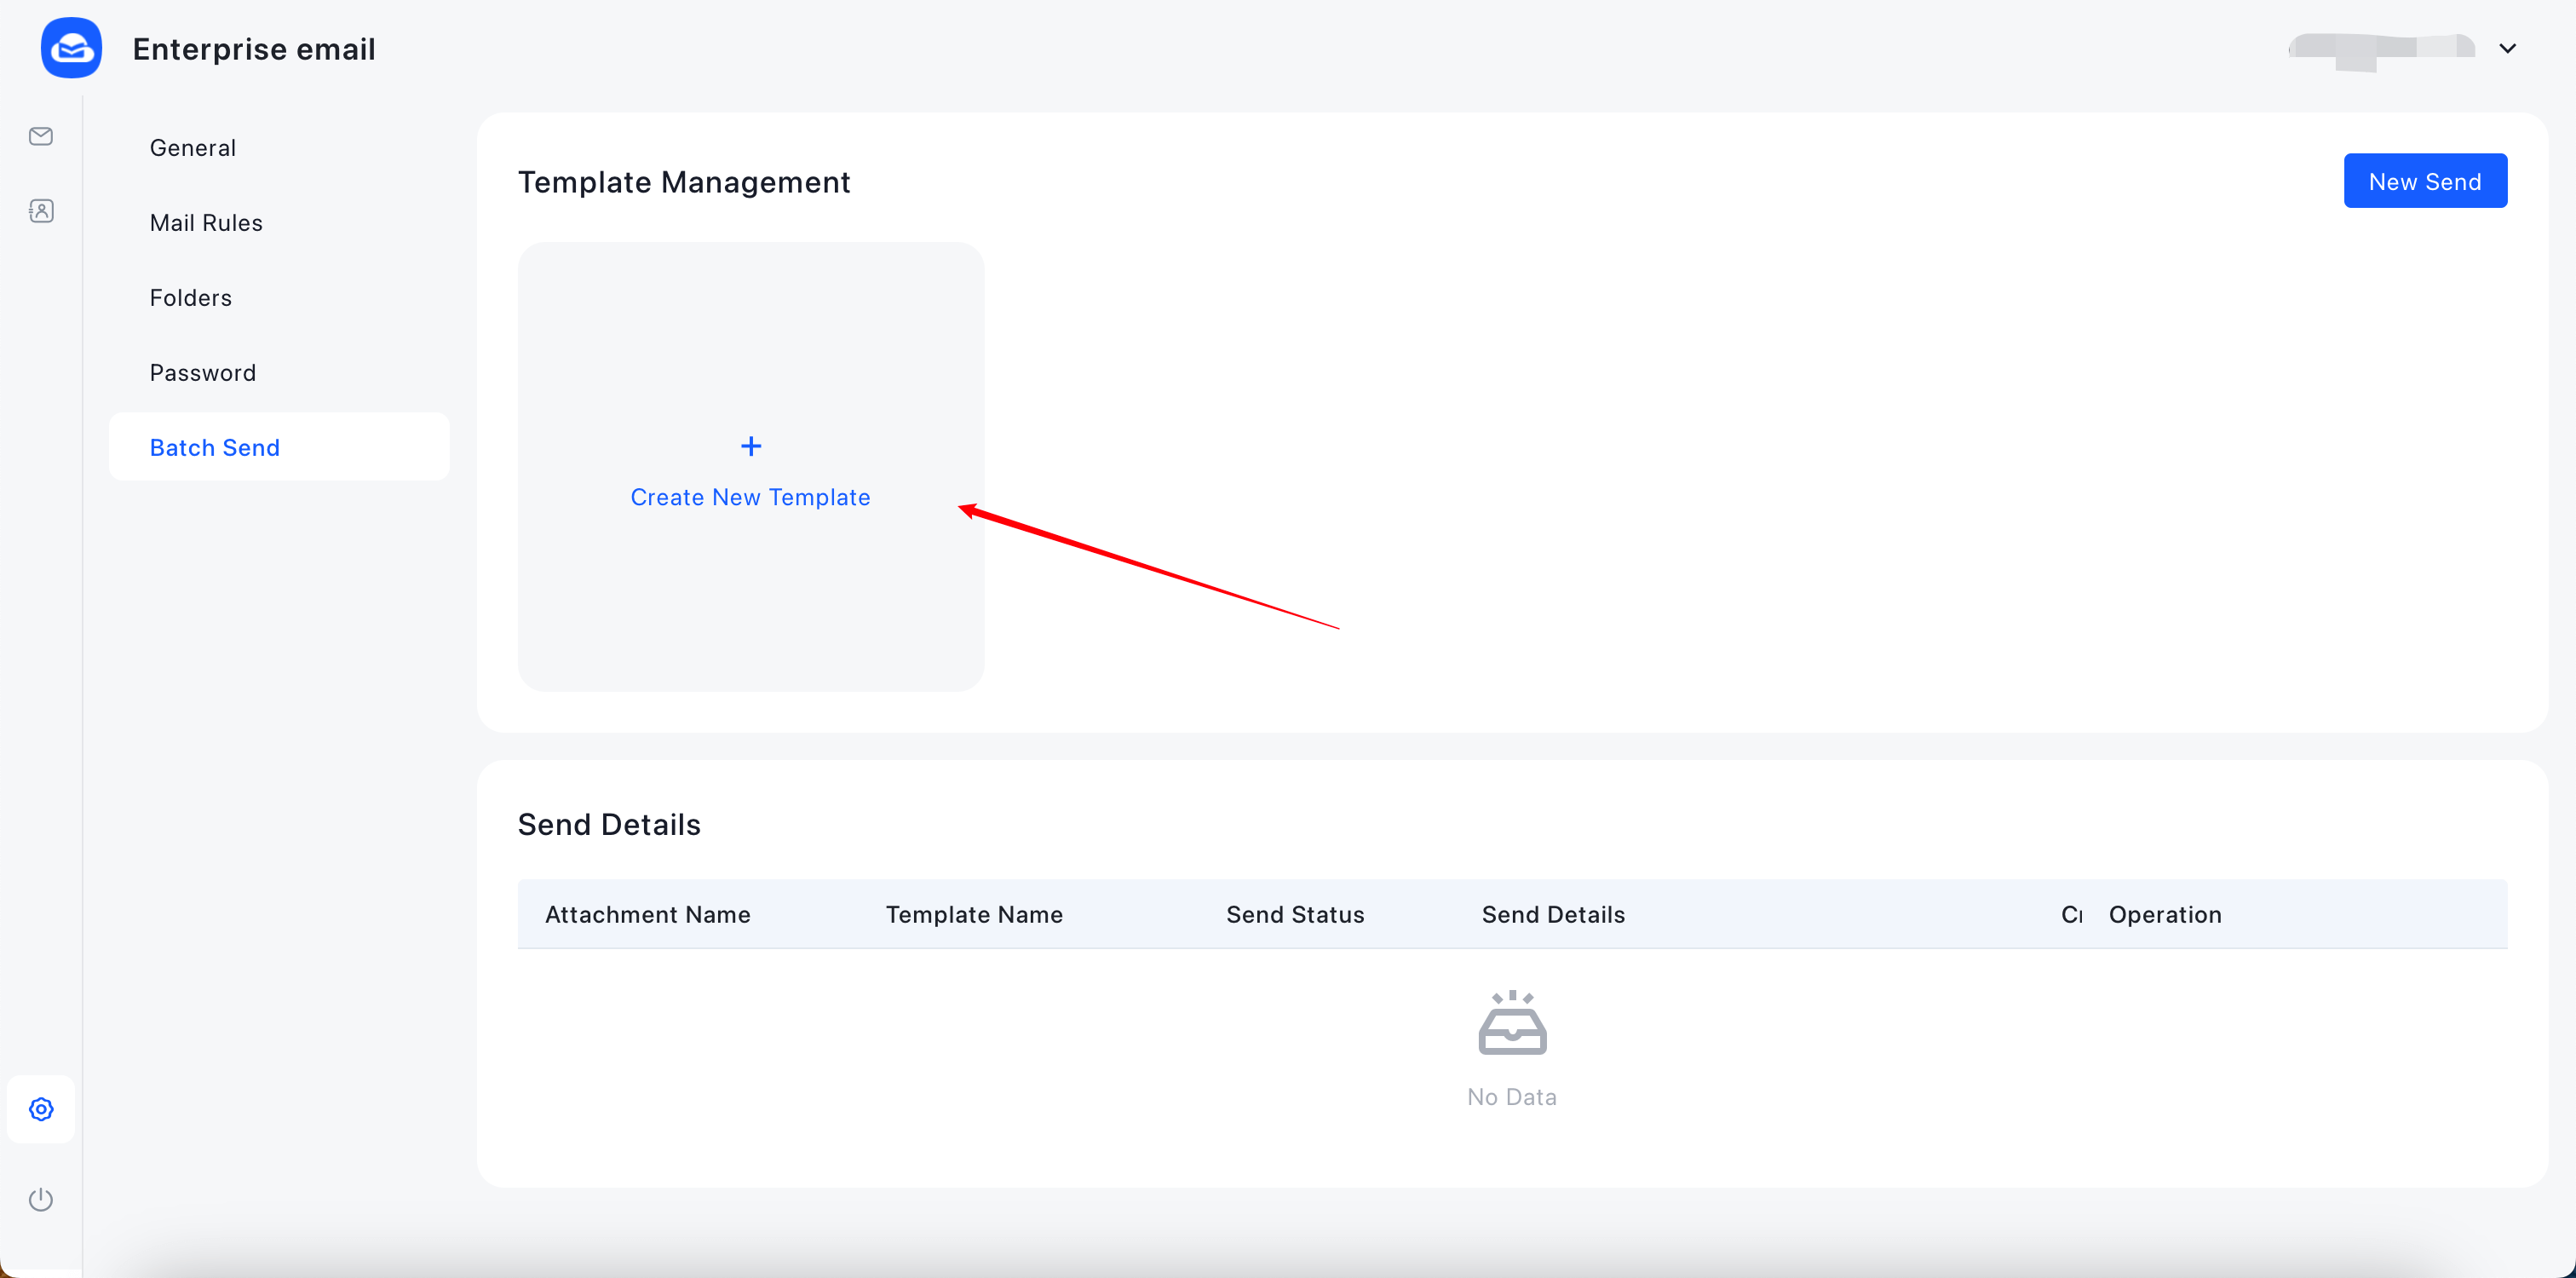
2. Click Create Template on the bulk send management page, then fill in the sender template details (no approval required).
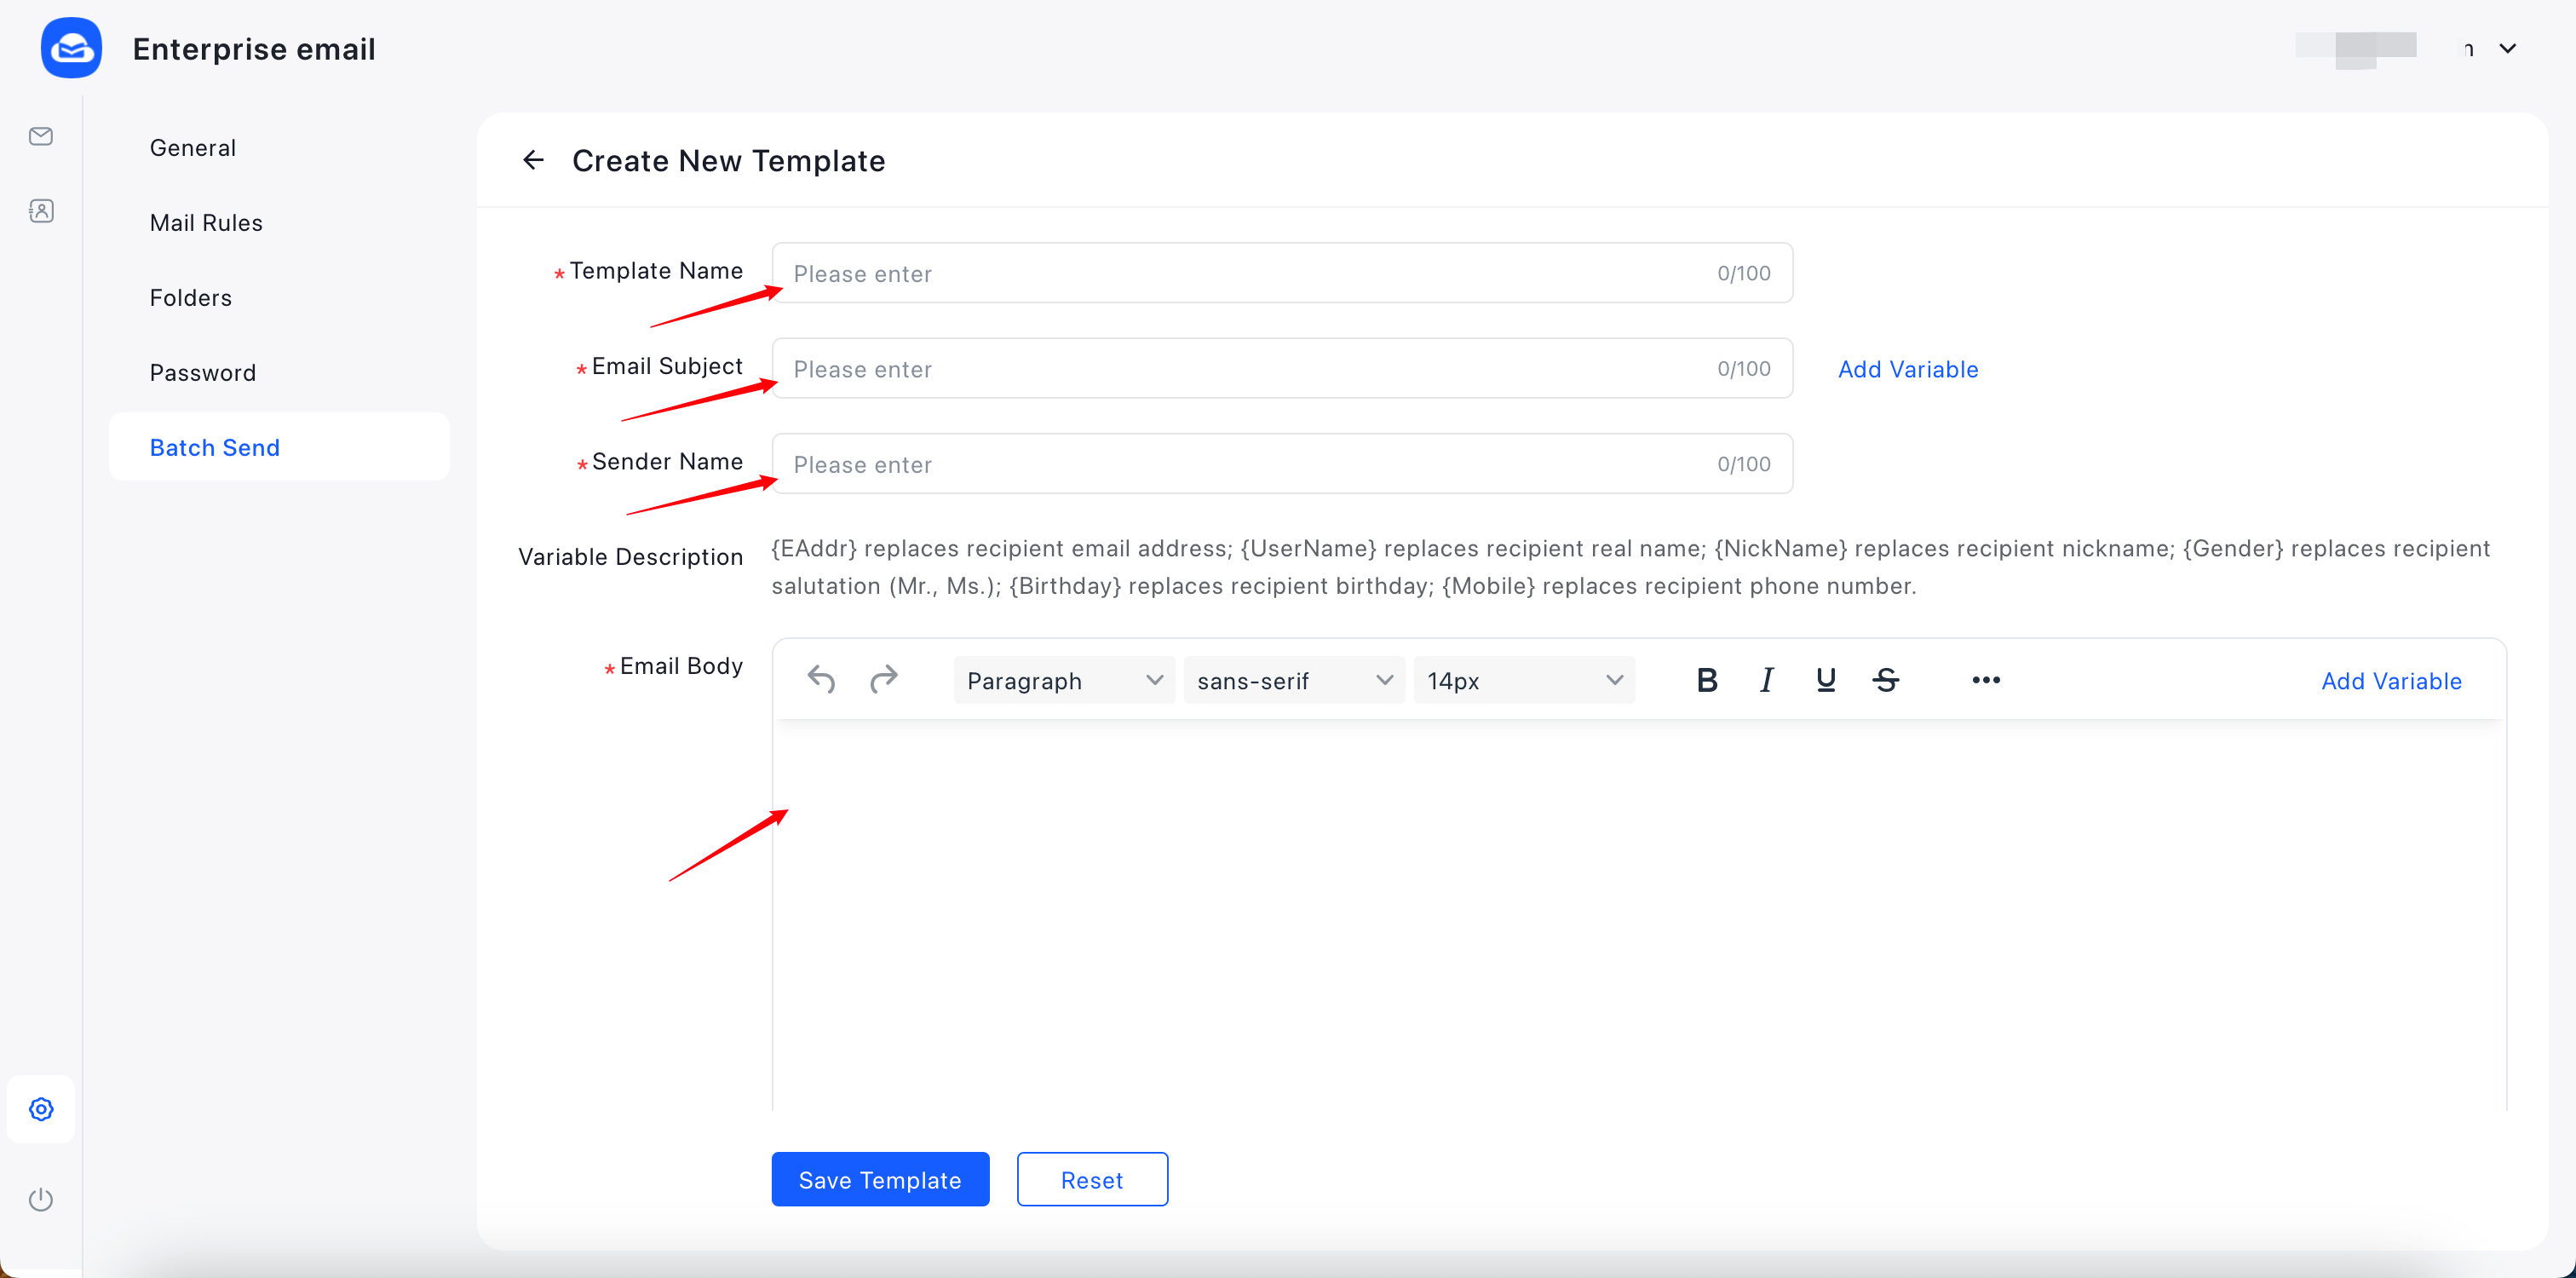
3. After entering the details, click Save Template.
III. Bulk Email Sending
1. On the Bulk Send page, click Send New to create a new email workflow.

2. Select an existing sender template.
3. Import recipient information (download the import template, fill it in, then upload it; up to 100,000 entries per batch).
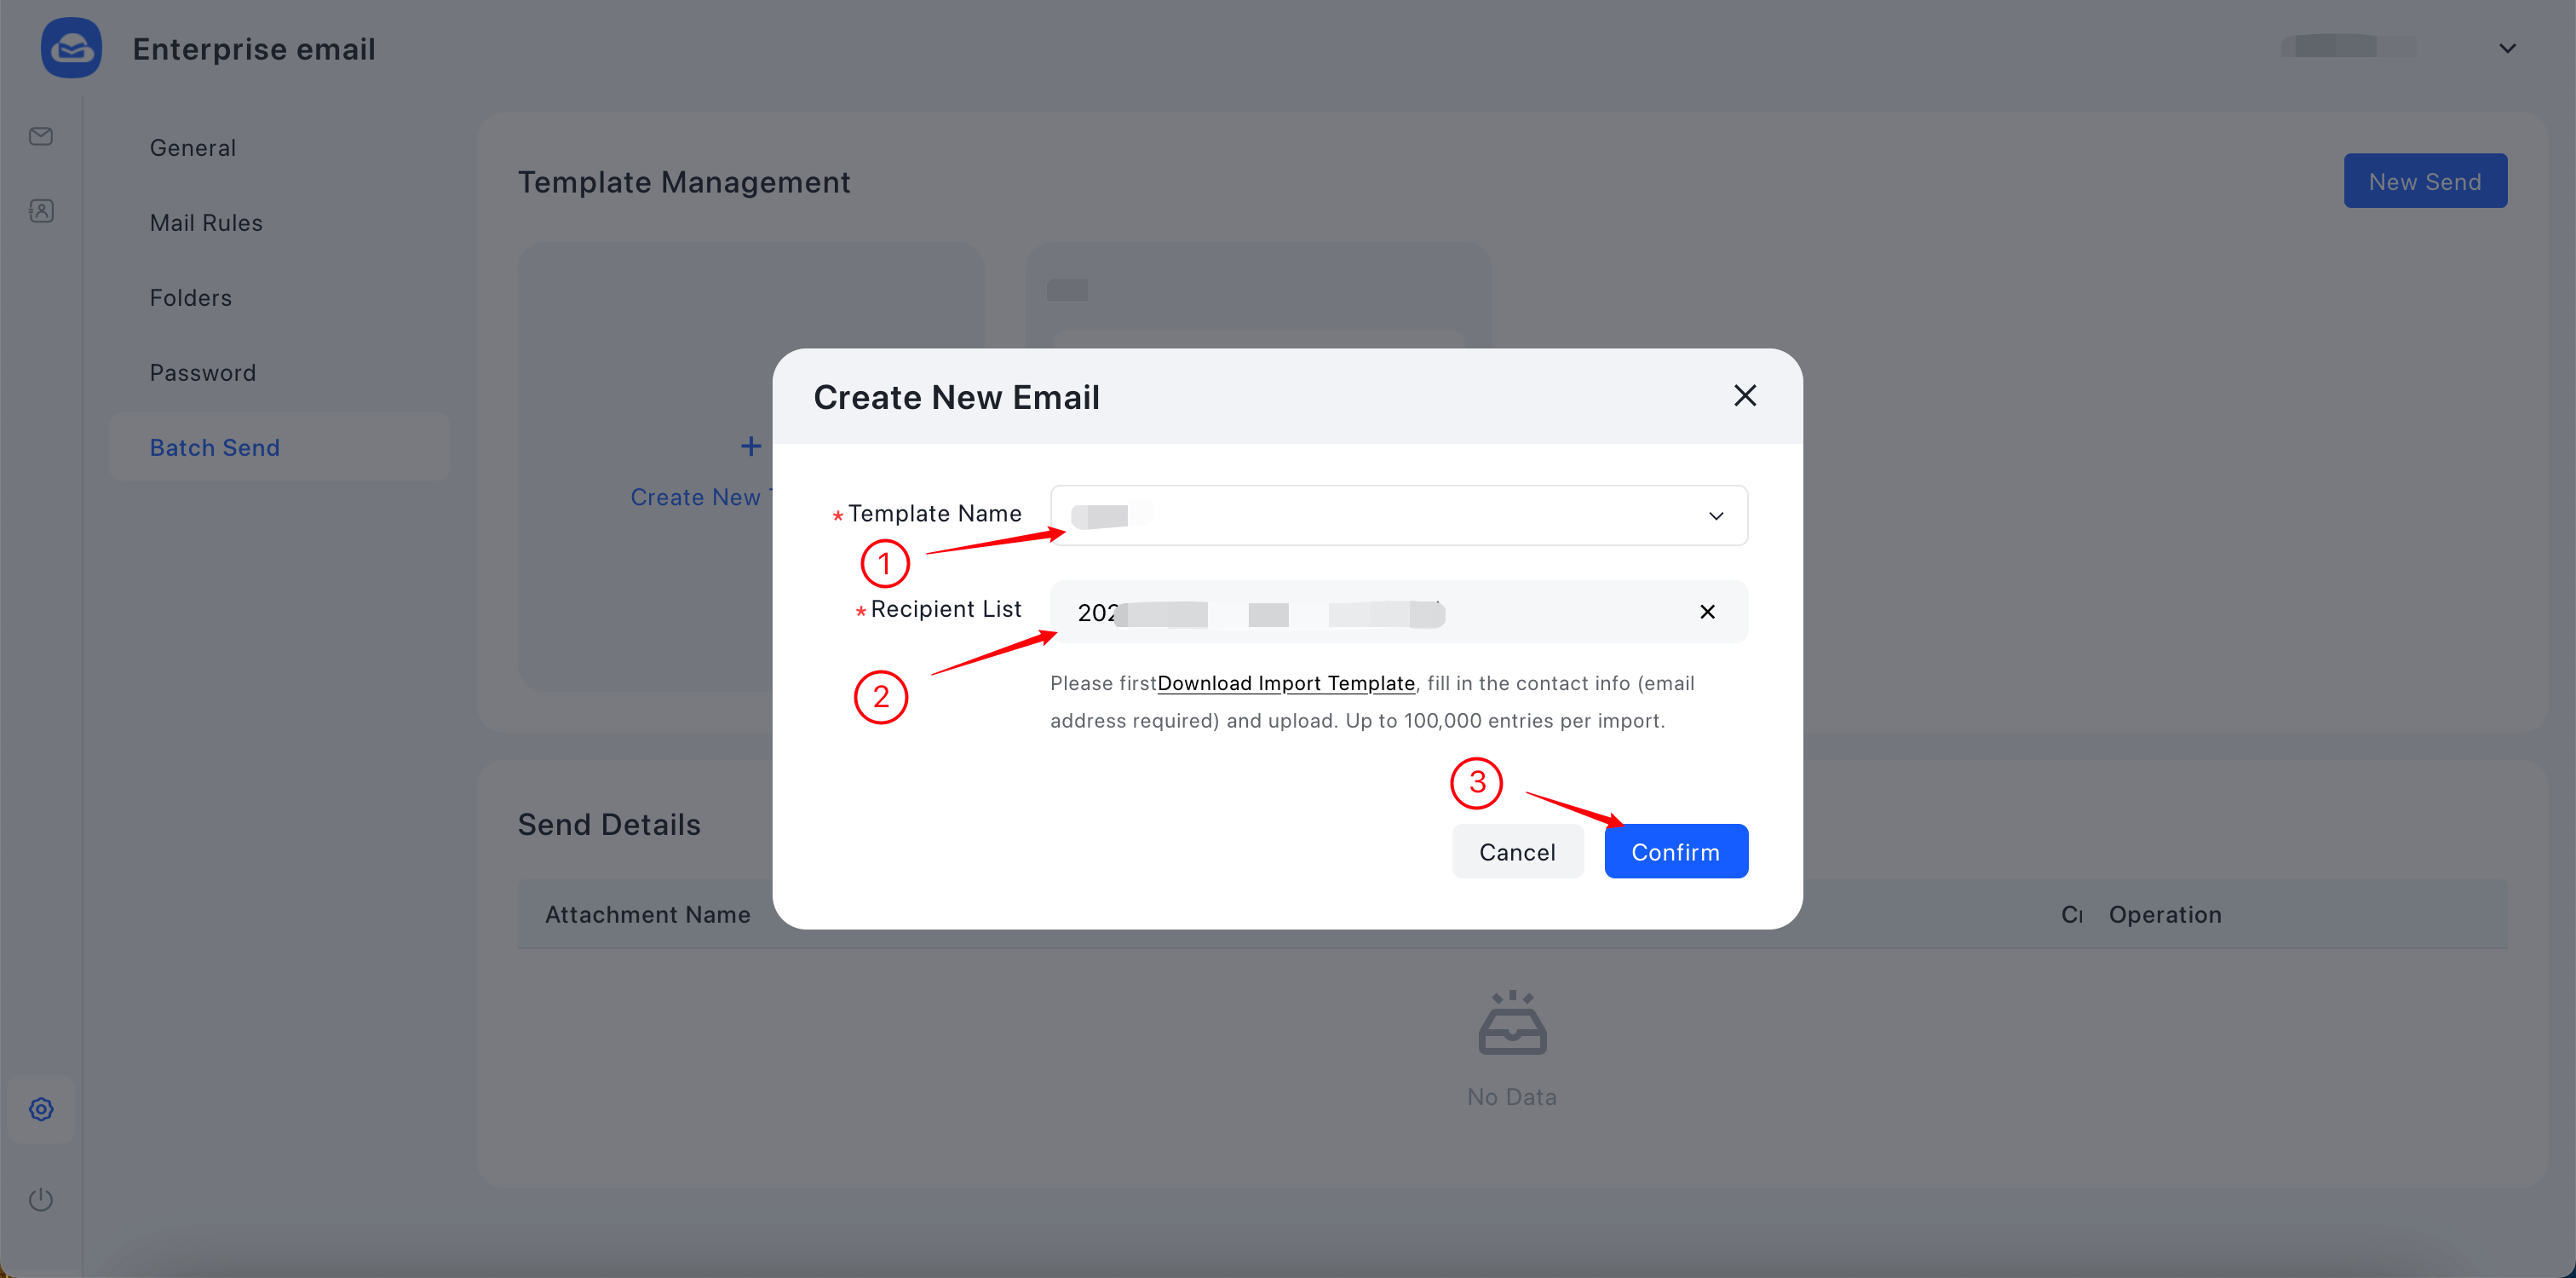
4. Once configuration is complete, click Confirm to send.
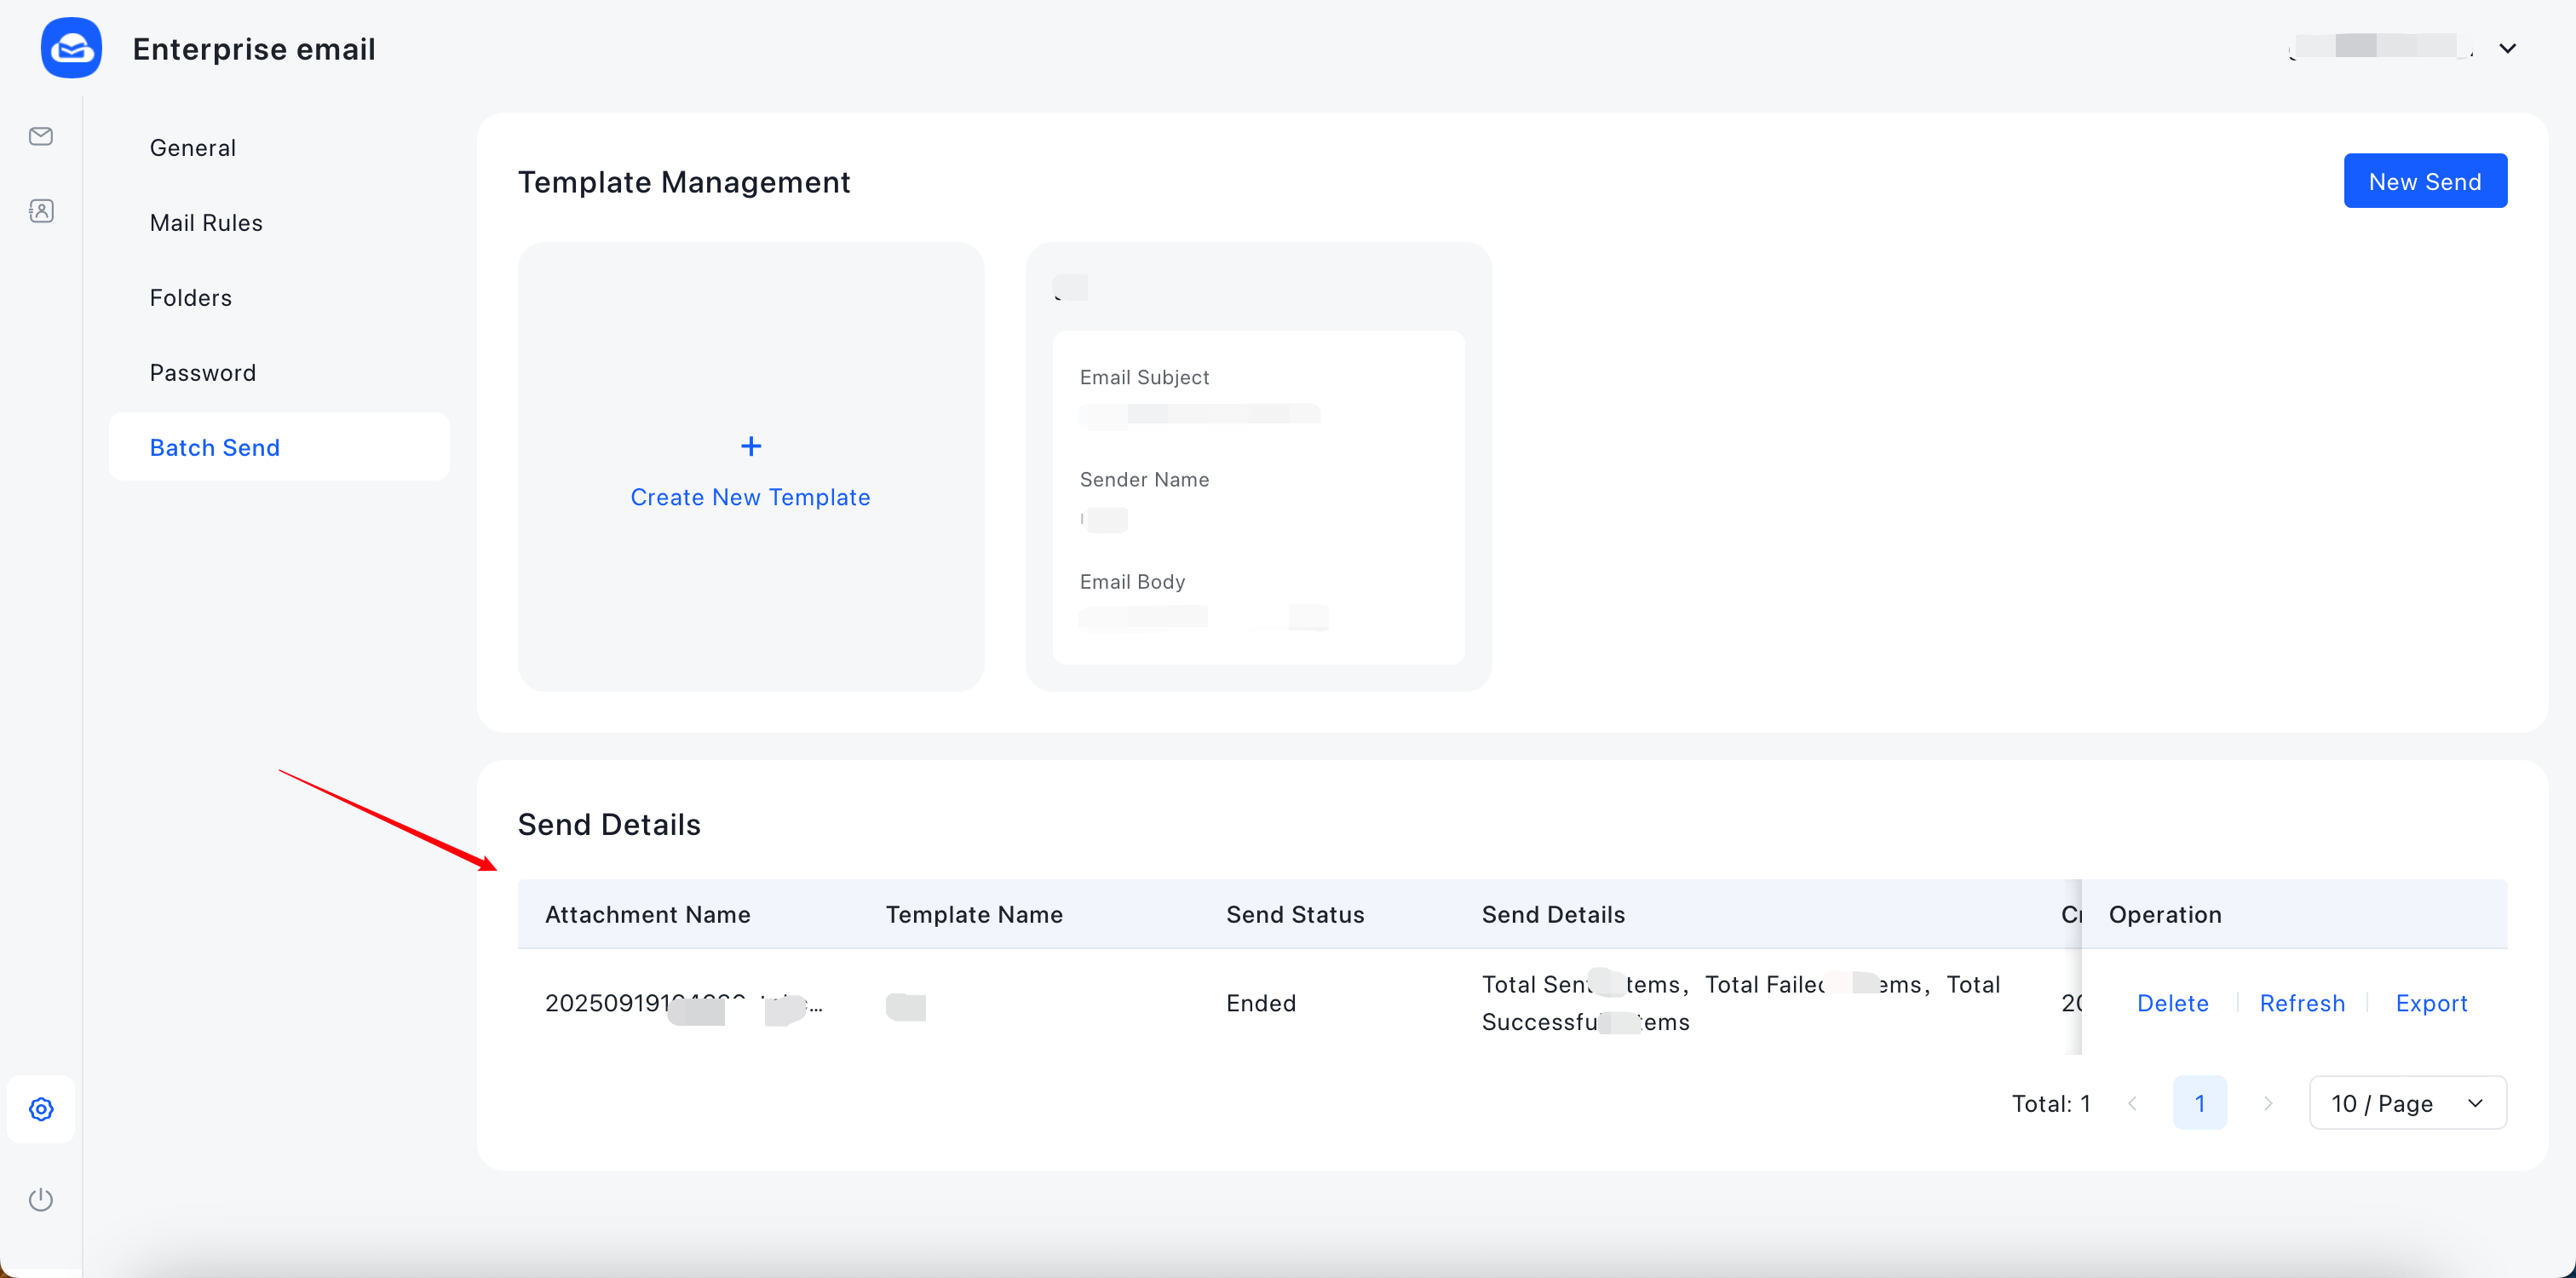
5. After sending successfully, you can view the details in the Send History list.
Reminder:
1. The mass email function is only available after the company mailbox is assigned a dedicated sending IP and the mass email resource package is purchased.
2. Dedicated sender IP accounts share one resource pack. The system uses your plan’s daily allotment first, then falls back on the bulk email resource pack if needed.


 supports the following regional currency settlement:
AlipayHK (Hong Kong, China): Supports HKD Settlement
TNG eWallet (Malaysia): Supports MYR Settlement
Boost (Malaysia) : Supports MYR Settlement
GCash Pay (Philippines): Supports PHP Settlement
Billease (Philippines) : Supports PHP Settlement
BPI (Philippines) : Supports PHP Settlement
DANA Pay (Indonesia): Supports IDR Settlement
Kredivo (Indonesia) : Supports IDR Settlement
TrueMoney (Thailand): Supports THB Settlement
Rabbit LINE Pay (Thailand): Supports THB Settlement
K PLUS (Thailand) : Supports THB Settlement")